Assembling
This guide mainly focuses on the parts listed in the Hardware Buy guide.
Hub Hardware Requirements
- ESP32 board
- 433 MHz transmitter (ASK/OOK)
- Soldering station (potentially optional)
- Hookup wire (optional, depending on whether the pins line up)
What/Where to buy?
See the hardware buying guide here. For the hub assembly you'll need an ESP32 and a 433 MHz transmitter.
Figuring out the pins
You will need to connect the 433MHz transmitter's signal input pin to one of the ESP32's IO pins, and you can optionally connect an Emergency Stop button/switch to another pin.
Most of the GPIO pins on any given ESP32 board should work for both RF TX and E-Stop, however some pins are reserved for special usage and will return an error if you attempt to use them during setup. If you run into that error, adjust your setup to use a different pin with a higher number.
Note down which GPIO pins you soldered to, as you will need to enter them during setup in a later step.
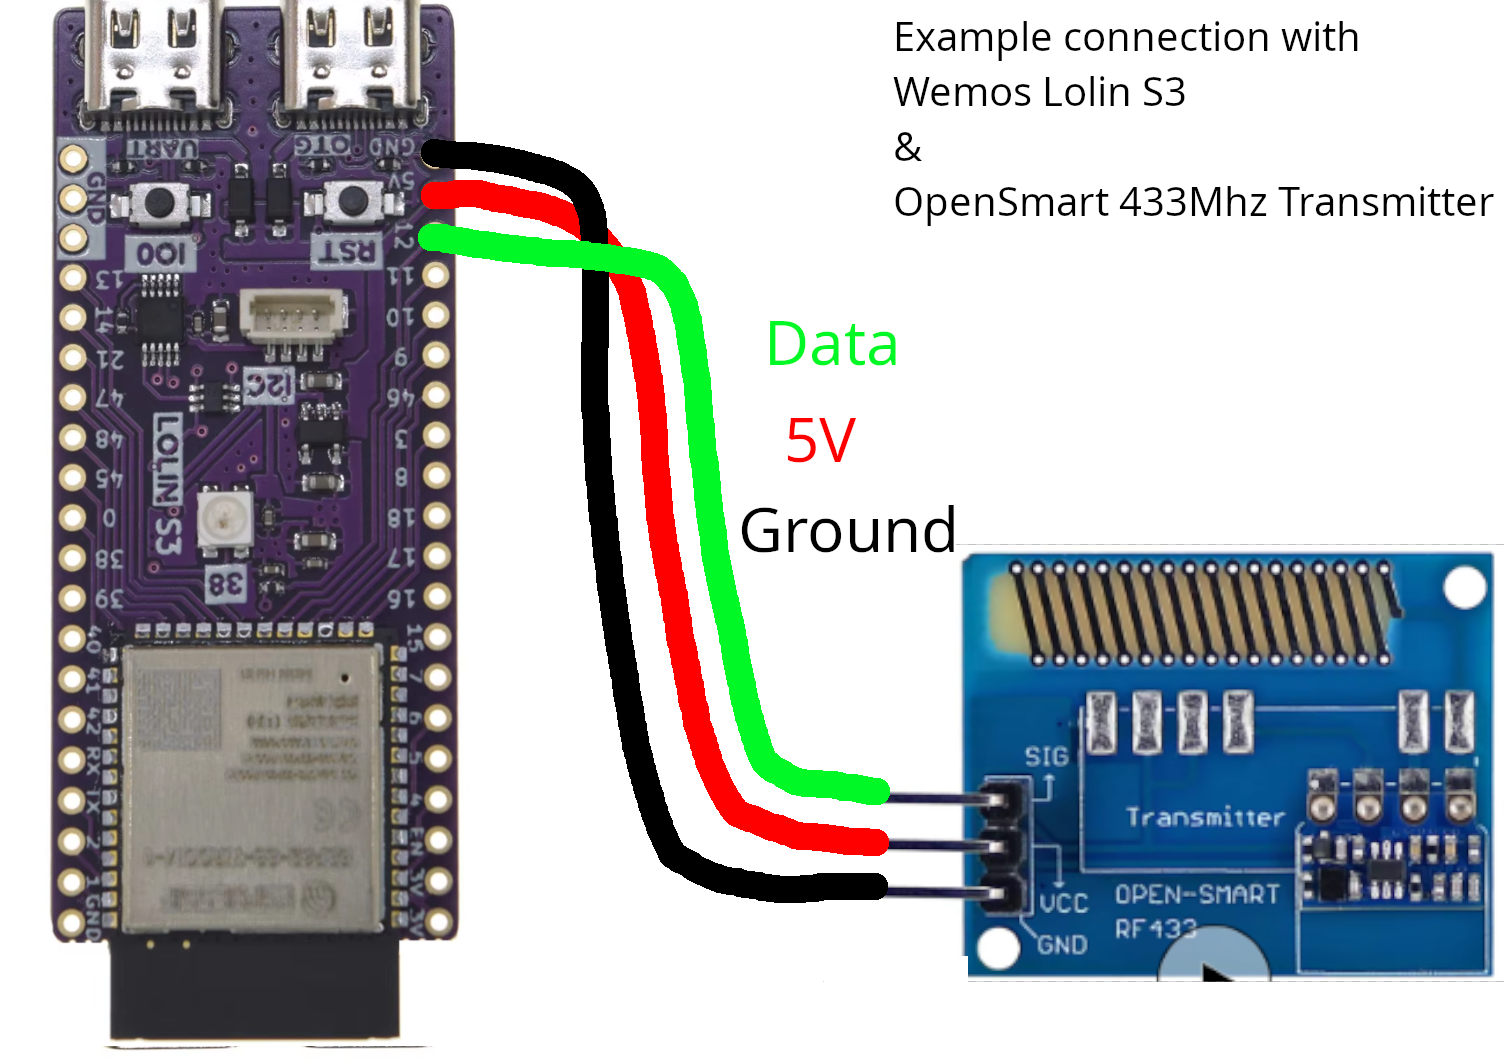
For example, if you bought a Wemos Lolin S3 and a Open Smart Transmitter, simply connect the 5V to the 5V pins (aka VCC), ground to ground, and any numbered pin to data, for example, the 12 pin.
Don't forget to enter these during setup!
You will need to set your RF TX pin during setup. If the pin is incorrect the transmitter wont be able to send any signals to the shockers.
If you already went through the setup process, you can change the pin via a serial terminal with the command rftxpin # where # is your pin number.
You can change E-Stop pin with estop pin # where # is your pin number.
Or, you can re-enable the Captive Portal on the website under the Hub's "..." menu and connect to it again with your phone.
Logic level compatibility
Please note that all ESP32s operate at 3.3V logic levels. To avoid overvolting your ESP's IO pins, it is recommended to either: connect your transmitter's power input to a 3V supply pin on the ESP's board, or use a logic-level shifter if your transmitter really requires more than 3V power to operate.
Next step is flashing the firmware!